Showing posts with label Day of the Dead. Show all posts

Sunday, 2 November 2014

2. Dia de los Muertos Part Three and giveaway winners

Love the memory quilt Lou and a great tutorial on making tissue paper fabric. I still have some left after my project here so I will be having a go at that.

Firstly, the Wicked Wednesday giveaway winners of the canvas/card/pendant sets are:

Pauline Davidson (from facebook)
Donna (Snarky Stampers)

I will be in touch shortly for address details.

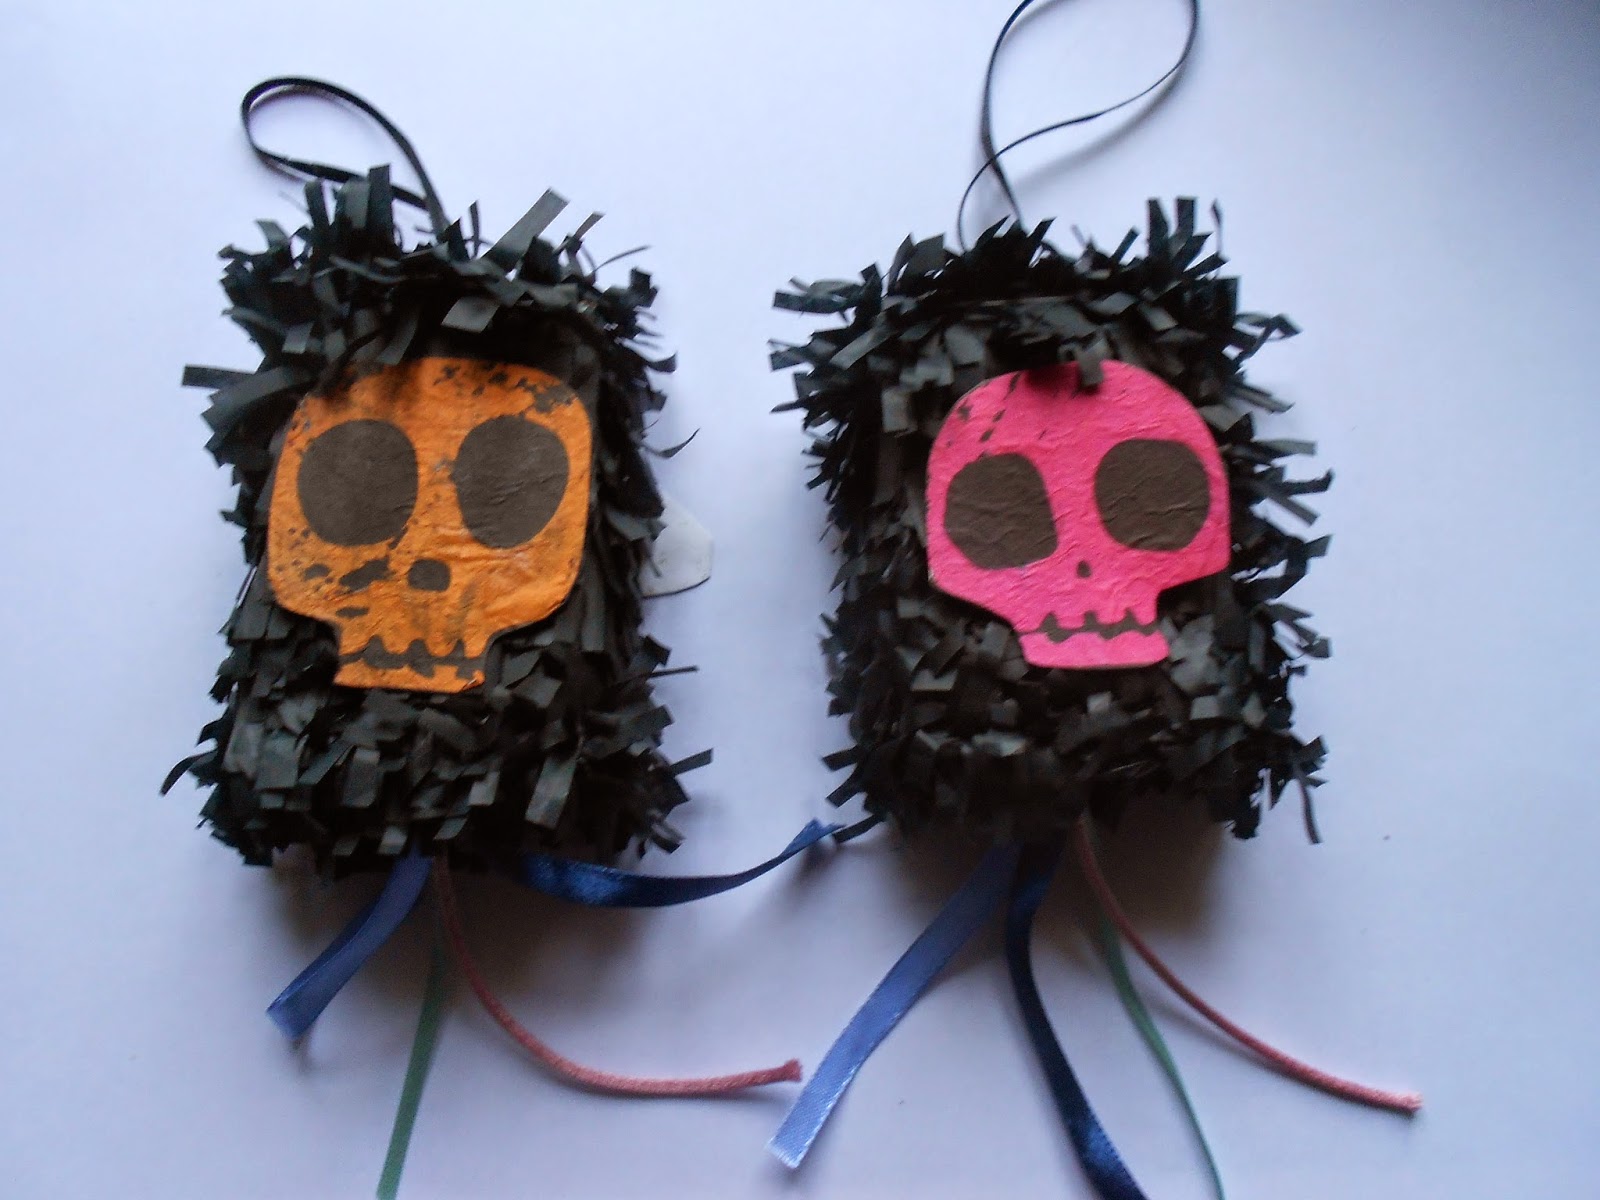
Now, my final project before we have a little break - mini matchbox pinatas. Remember the mini matchbox monsters I made? Well, I still had some matchboxes left and I love pinatas (and always have them whenever we have a party) so I thought that some mini ones would be fun.


Now, these are just the matchboxes, covered in fringed tissue paper at the top and sides.

I wasn't sure what to do to decorate them, so I looked to my shower curtains for inspiration. Yes, I have Mexican Folk Art shower curtains like these!


I did my own interpretation of the couple in Posca and Sakura gelly roll pens. I wanted them to look a bit naive so they are deliberately rough. That's my excuse anyway.

Next thing to do was to poke a hole in the centre of both the top and bottom of the inner box. I threaded one loop of ribbon through the top and knotted it on the inside, and a few different ribbons at the bottom, again knotted on the inside of the box. Fill the box with little sweeties and then just pull on the bottom ribbons to open them up.


Fun as little table decorations just as they are. However, if you want to hang them up and make them open more like real pinatas, cut the inner box in the bottom two corners as shown below, then use some sticky tape to stick the box back together,


Hang them up and pull the ribbons at the bottom. As the bottom is now weaker than the top, the taped flap should open up spilling the sweeties out of the bottom. You could of course just bash them with a stick too I guess!


There are other ways to decorate them too. Here, I used some skulls cut from a napkin.


The other thing to do is the classic sugar skull. Here, I used this picture drawn by my super talented daughter Alex (thanks Alex), scanned and reduced in size on some white pinatas. Loads of possibilities so have a go.


Finally, a big thanks to everyone who has worked to make this blog happen, both the lovely contributors and the equally lovely people who have taken the time to read and comment here. It's been a lot of work but huge fun.

I have entered this into the Left of Center challenge because, well I can!

We will be back after a little break with some Christmas crafting on the dark side.

Thank you all.

Bex

Saturday, 1 November 2014

1. Dia de los Muertos Old School Style

Wow Lou - what a fabulous canvas yesterday. It has a really spooky, ethereal look which is stunning. Jas, those pumpkins were to die for, and the little bats from Tazz were super cute.

Halloween may be over but the fun isn't yet as we still have Dia de los Muertos (Day of the Dead) to celebrate for the next two days. So here is the first of our offerings, and I make no apologies for it being seriously old school!


Now, Halloween my be concerned with all that is ghostly and ghoulish, but Day of the Dead celebrates the lives of those who have passed on, and one of its most iconic images is that of the sugar skull. Google it, and most of the images that come up are white and colourful, so I decided to twist it around a little and make the skull black.

Now, here's where it goes old school. Does anyone remember that black paper you used to get when you were a kid, and you could scratch through the surface and underneath would be a rainbow of colours? Well, you can make your own with just some oil pastels, black poster paint and washing up liquid. 

Take a piece of thick watercolour paper and cover it with splodges of oil pastels in your chosen colours. I went for the traditional bright and vibrant shades associated with Day of the Dead, which are ideal as they show up well against the black.


Then, cover this with a thin coat of black poster paint to which one or two drops of washing up liquid have been added. I used a sponge roller to get a nice even coat. Leave to dry, then add a second coat and let dry.

Now, your paper will be black, and unless you're confident enough to scratch out the design freehand, you'll need an image. Find a sugar skull you like (there are loads of free images out there) and print it out on thin photocopy paper. You're going to need your oil pastels again, to cover the whole of the back of this image with white pastel. Then lay the image on top of your back paper and trace over it. This will transfer the white pastel to the paper. I used a red biro just so that it was easier to see what I had already done.


Next, take a cocktail stick or wooden skewer (something with a nice pointy end) and scratch along the white lines and anywhere that is black in your original image to reveal the coloured pastel underneath and you should end up with something like this. I chipped a few bits of the paint of around the image by accident, but if it bothers you, just touch it up with a little of the black poster paint.


Now, I liked this as it was, but I also decided to experiment a little with different looks.  With a white Posca, I added an outline to the main features and coloured the teeth. I like this look too, but it made the background seem a bit bare.


So, I then decided to add some flourishes. Taking the photocopied image (which still had white pastel all over the back) I stamped some swirls and flourishes using the stamps you can see next to the image above. You can then trace over these stamped images and scrape them off to produce a more lively background like this.


Hmm - I'm not so sure about this one, but it may grow on me and if not I can always just paint over the background again.

I have entered this into the Left of Center Challenge.

Anyway, back very soon for another Day of the Dead project.

Enjoy, and thanks for looking.

Bex