

You can add a surprise pop up bunch of flowers to your sugar skull papers, for this I used this youtube tutorial however there are hundreds out there, I made the flowers out of book pages, and very bright dylusions inks, with the flowers being so thin, you have to take care how you ink them, but this also means that the flap almost folds completely flat.
However i also wanted to go big creating a halloween wreath for my front door so I looked into recycled plastic bottle flowers.
Get a bunch of empty bottles and cut off the bottoms (normally you find a line where the bottle material becomes thinner this give you plenty of room for petals) Cut them in to various petal shapes (using tim holtz scissors) and then heat - Be aware heating with a heat tool to shrink and shape will release fumes, so make sure you wear a mask, however I found dunking the edges in just boiled water creates the same effect with only slightly burned fingers rather than having to sit with a mask on in a well ventilated area. Join different sizes together and colour, colour with beads, add to a pre-made wreath cut out or add stalks and show in a vase.
However i also wanted to go big creating a halloween wreath for my front door so I looked into recycled plastic bottle flowers.
 |
| These are photos shamelessly 'borrowed' from the interweb, rather than reinvent the wheel i also found these detailed instructions here, others are widely available. |
Once I started making these a couple reminded me of the gorgeous Tower of London poppy installation, I was saddened to see they had all sold out, so had a go at making my own. Using SculpyIII clay in red hot red and a glittered white.
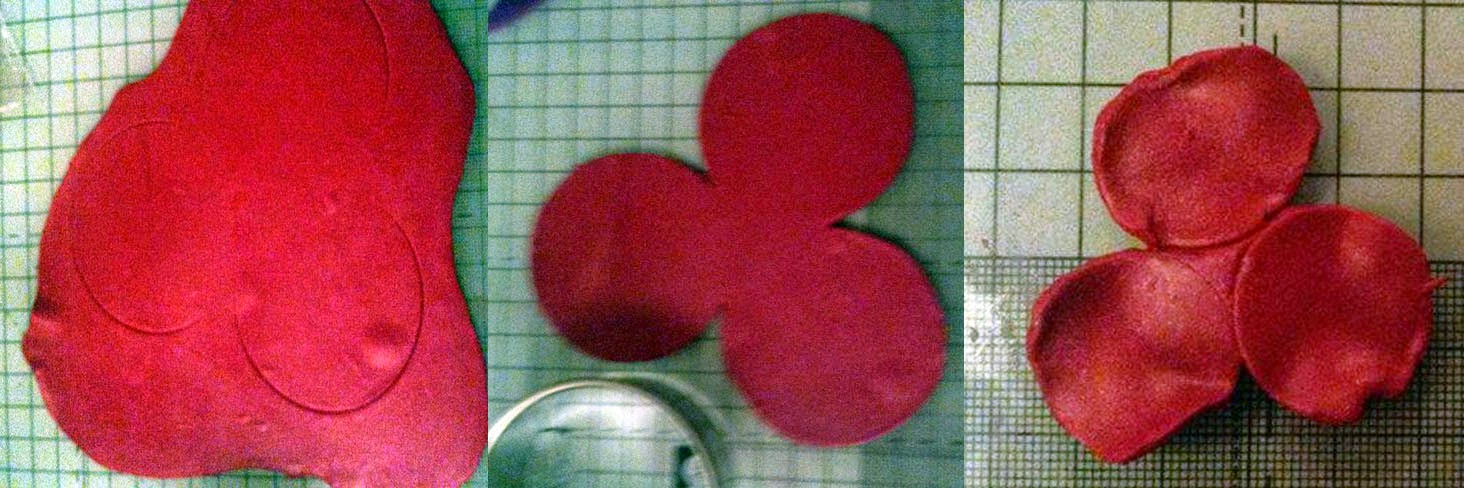 Soften your clay and evenly roll out, using a circular cutter gently press the three edged shape into the clay - not cutting all the way through, then use a knife cut the impressed lines leaving the centres joined and release from the clay, make 2 the same size. gently roll the edges so you don't have a straight edge, then gently tease the outer circular edge so its not so uniformly circular.


I have entered this into the Left of Center Challenge.
Jas x
lay the two on top of each other unevenly, then pull up the centre three and shape, tucking them around each other, also shape the back 3, once happy use balled up backing paper, to stop them from sticking when baking.
Once cooked and cooled, you can colour them or decorate as you like,
I really hope you've had just as much fun as I have had, reading every ones posts, comments and playing along. Join us back at 2 today for Rebeccas final DotD post, and see you in December. :)
I have entered this into the Left of Center Challenge.
Jas x
No comments:
Post a Comment